An Introduction to GraalVM
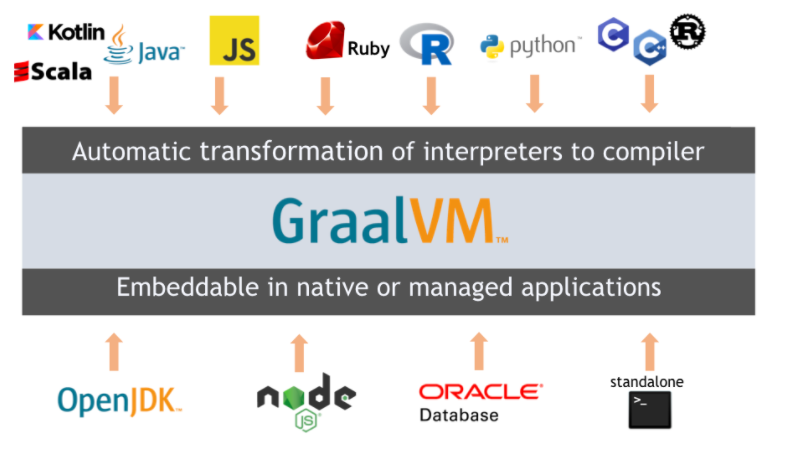
GraalVm is a polyglot ‘VM’ engine built using Java. It provides an interoperability runtime environment with JVM languages; guest languages like WebAssembly, Javascript, Ruby, Python, and R; LLVM supported languages like C, C++, and Rust. And on top of interoperability, it provides a high-performance platform for execution. GraalVM has several patented Just In Time performance optimization capabilities.
Runtime Environments
GraalVM provides multiple runtime options:
- Java Hotspot VM with the GraalVM compiler enabled
- js runtime environment
- LLVM runtime environment
GraalVM Architecture
GraalVM provides a Language implementation framework known as Tuffle, and it is an open-source library. It provides a mechanism to create language interpreters for GraalVM by generating a self-modifying Abstract Syntax Tree(AST) for guest languages. Hot paths in ASTs are optimized by GraalVM during the compilation process using JIT.
In the case of LLVM supported languages, they are usually statically compiled. GraalVM provides a tool lli that first interprets the program and later compiles it with GraalVM to optimize the hot path.
Let’s make our hands dirty now.
GraalVm documentation provides detailed steps to set up with IntelliJ IDE. If you prefer to use IntelliJ use this guide.
Set up GraalVM with Eclipse
- Download the GraalVM community edition package from the Githubrepository depends on your operating system.
- Unzip and untar to your local directory. Ex: C:/Tools/graalVm
- Set environment variable JAVA_HOME and append the JAVA_HOME to the PATH variable. Ex: JAVA_HOME=C:/Tools/graalVm/bin and PATH= $PATH:$JAVA_HOME
- Create a new java project in Eclipse
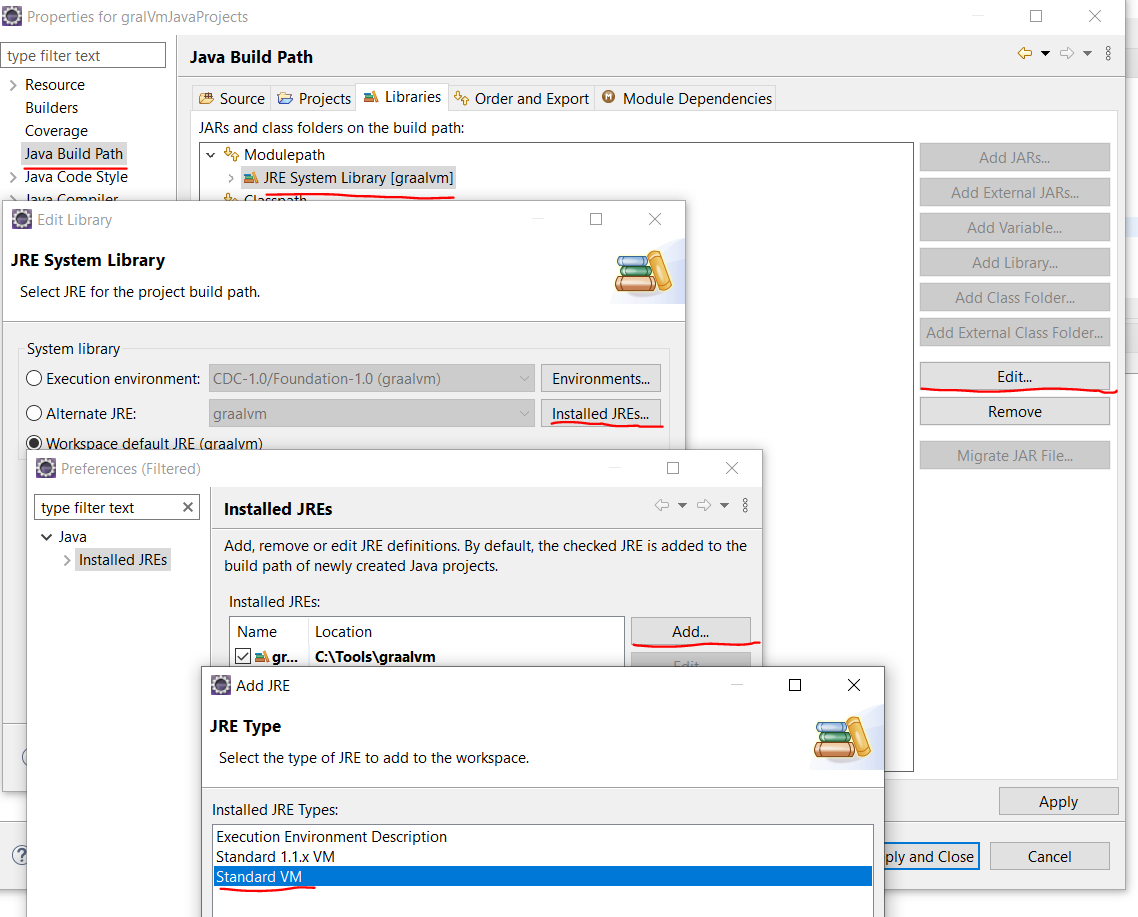
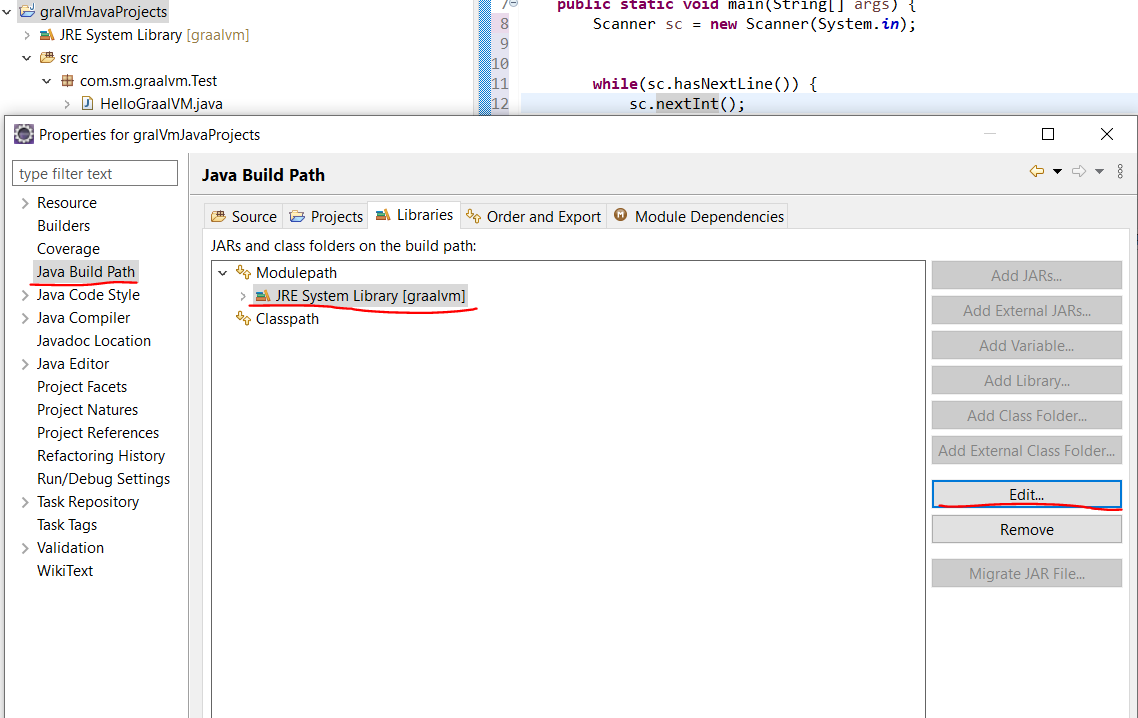
- Right-click on the project and go to properties
- From the left pan, double click ‘Build path’
- From the right pan, select the tab ‘Libraries’
- Now you will see the ‘JRE System Library’ listed below. Select it.
- On the right pan, press the button ‘Edit’. It will pop up next window.
- Press the button ‘Installed JREs’. It will pop up next window
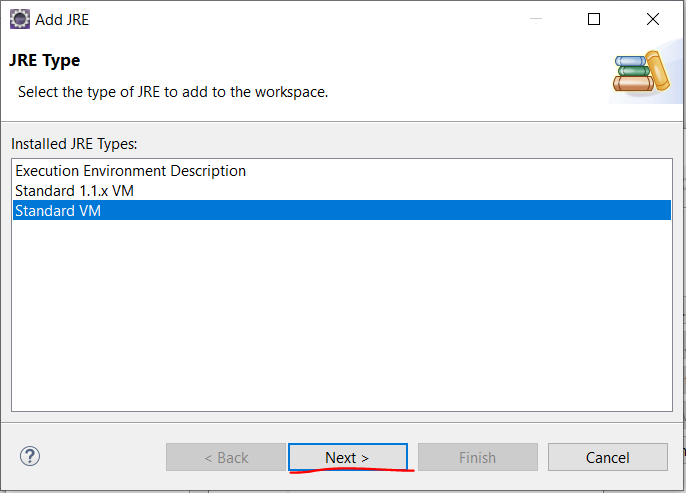
- Press the button ‘Add’ and from the pop-up window select the ‘Standard VM’
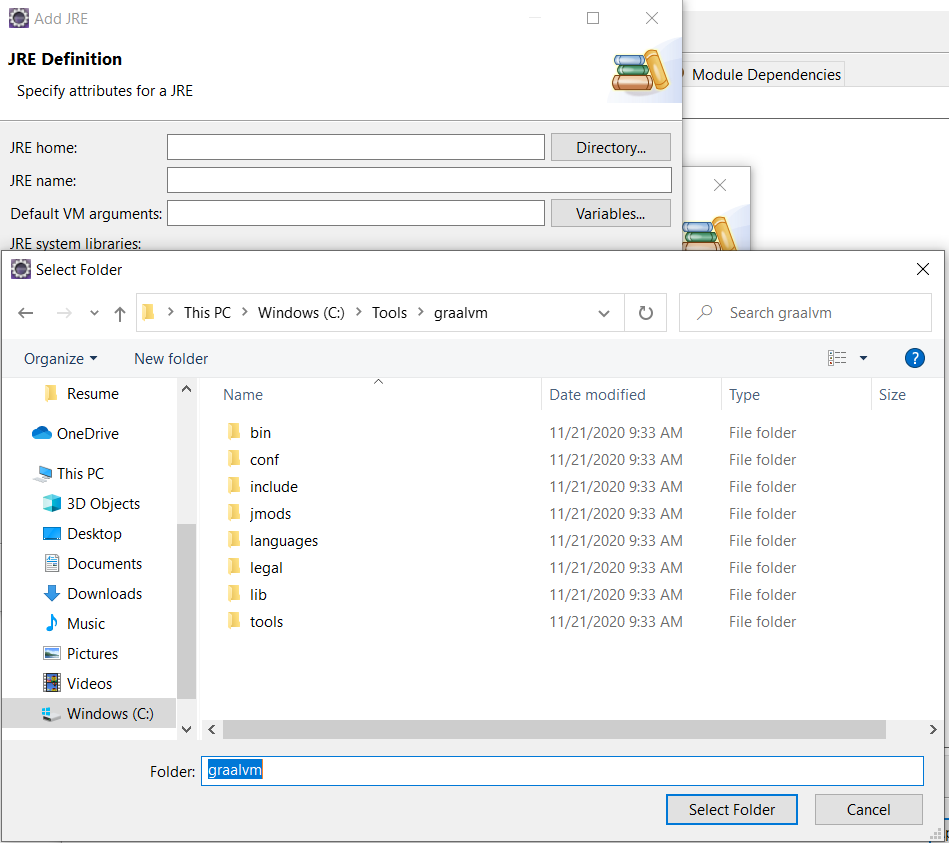
- In the next pop-up window, press the button ‘Directory’ to browse and choose the GraalVM home directory. Ex: C:\Tools\graalvm
- Press button Finish
- From the ‘Installed JREs’ window, choose the newly added GraalVM as our JRE for this project and press the button ‘Apply and Close’.
- In the next pending opened window press the buttons Finish
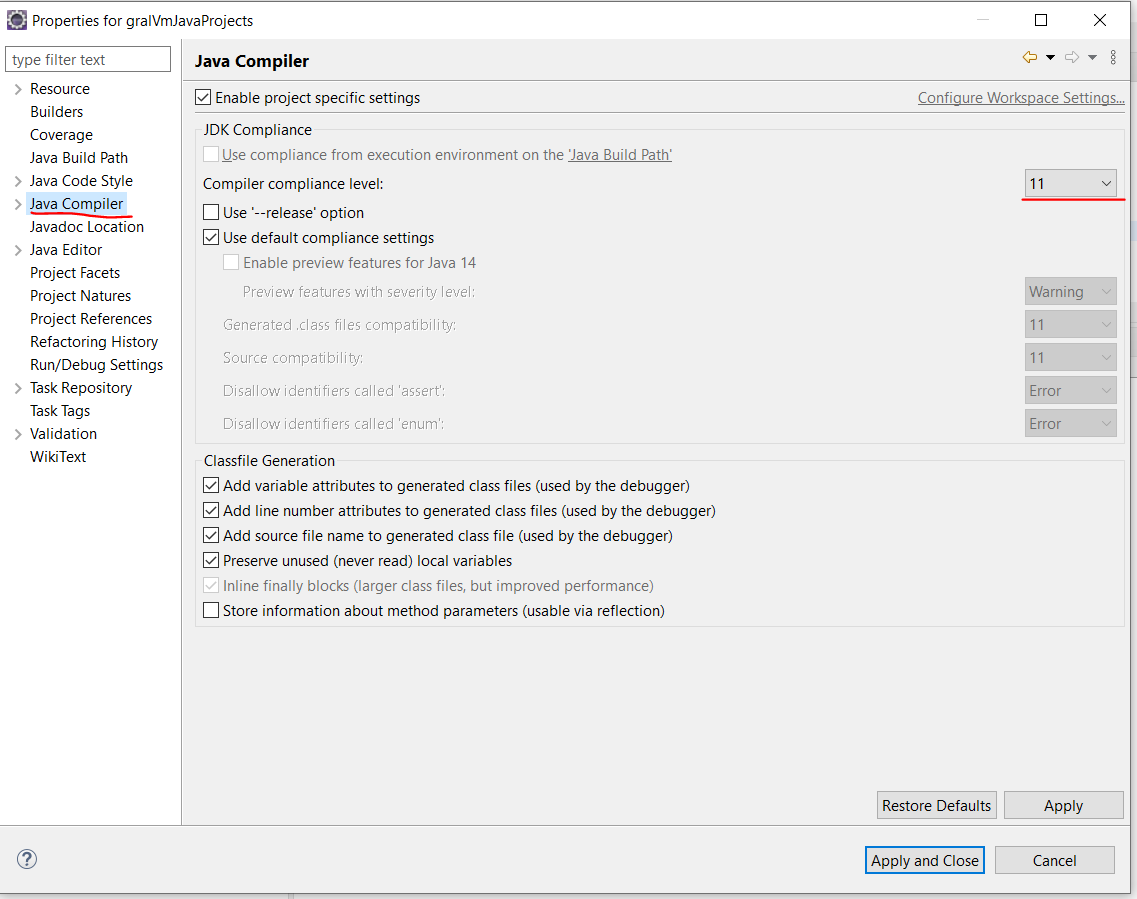
- Hope now you are back to properties windows for your project. Select Java compiler from the left pane.
- On the right pan, against ‘the compiler compliance level’ chooses the matching Java version from the drop-down box.
- Now you are all set, press the button ‘Apply and Close’
Now we can write our first java program using GraalVM. Happy coding!!
